Surgical scars may generate adhesions between damaged tissues. This often limits the sliding action of the tissues and reduces their elasticity and range of motion. A scar adhered to the connective tissue, fascia, often restricts movement and causes pain, not just in the area of the scar but also elsewhere in the body due to tightened connective tissue chains.
Lymph flows in the surface layers of the skin. Swelling may result when scar tissue with adhesions blocks lymph flow. Soft tissue manipulation can increase the mobility and elasticity of the area around the scar, detach scar tissue from connective tissue and reduce swelling.
6D Tape can be used to stimulate lymph flow, blood circulation, fasciae, scar tissue, muscles and joints by manipulating the tissue. Activating the tissue by lifting, pressing and twisting the handles will promote its metabolism and circulation.
Self-care instructions for scars
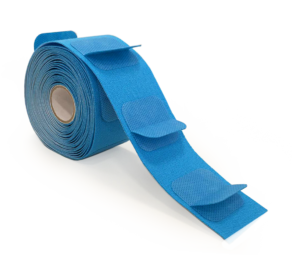
You will need one five-meter roll of 6D Tape. Follow the instructions to cut the correct strips. One five-meter roll is enough for multiple treatments. Also see the general treatment instructions.
1. Clean
The skin must be clean, dry and hairless. First remove any hair from the area where you will apply the tape. Always clean the skin with a cleaning solution before applying the tape. For maximum adhesion, make sure that the skin is not moist or sweaty.
2. Cut
Cut off an appropriate length of tape and round the ends to keep it from catching on clothing. For the supraclavicular fossa, you will need a strip two handles in length. If the scar is located in the left upper quadrant of the body, the lower body or the legs, place the activation tape on the left supraclavicular fossa. If the scar is located in the right upper quadrant of the body, place the activation tape on the right supraclavicular fossa. You can apply tape to both supraclavicular fossa for more effective treatment. See the general treatment instructions. Watch the video for an example.
3. Tape
Remove the backing paper and avoid touching the adhesive. Avoid stretching the ends of the tape. To minimize the strain on the skin, we recommend that you never stretch the tape when you apply it. This makes the tape pleasant to wear for multiple days. This will also prevent accidental tissue damage from excessive stretching. If stretching is required, for example to make a turn in the tape, we recommend a maximum of 15 percent. Carefully rub the tape so that it adheres fully to the skin. Never stretch joints or muscles when applying the tape.
First, apply a two-handle strip of activation tape on the supraclavicular fossa. If the scar is located in the left upper quadrant of the body, the lower body or the legs, place the activation tape on the left supraclavicular fossa. If the scar is located in the right upper quadrant of the body, place the activation tape on the right supraclavicular fossa. Then apply two- or three-handle strips to the target area. You can use multiple strips as required. See the general treatment instructions. Watch the video for an example.
4. Activate and treat
Wait 15 minutes for the adhesive to take hold before you use the tape to manipulate tissues. Activate the tissue by moving the handles: lift, twist, stretch and press. Start by activating the supraclavicular fossae for one minute. Treat the neck and shoulders for approximately 5–10 minutes. Finish by activating the supraclavicular fossae for one minute. Repeat the treatment every 3–4 hours. Watch the video for an example.
5. Remove
6D Tape will stay on the skin for 3–10 days, depending on the number and intensity of the treatments. We recommend removing the tape after no more than 10 days. When it is time to remove the tape, simply roll it up along the skin. Warming up the tape makes it easier to remove, which you can do by rubbing.
Watch the video to see the correct application of tape on lower back scars
The video shows how to apply a five-handle strip of tape to the lower back, followed by one-handle strips on both sides and above the scar. One strip is also placed on the supraclavicular fossa. The video then shows how to treat the lower back with 6D Tape. Treatment starts in the supraclavicular fossa, continues to the lower back and ends in the supraclavicular fossa.
See how to correctly tape scars and swelling on the hip
These instructions are for the treatment of surgical scars and swelling after hip joint replacement surgery. First clean the skin and cut the appropriate strips of tape. Start the taping by placing a strip of activation tape on the left supraclavicular fossa. Avoid excessive stretching of the strip on the hip as you place it. Stretch the tape just enough to curve it along the scar. We recommend wearing 6D Tape for 3–10 days.
Customer stories about self-care for scars
Scar treatment and rehabilitation after lower back surgery
I rehabilitated myself actively with 6D Tape after my lower back surgery. I fully recommend it.
Surgical scar treatment
I find 6D Tape to be a good tool for active patient self-care in treating swelling and constricting surgical scars.
Scar treatment after breast cancer surgery
In my breast cancer surgery, the breast tissue was replaced on both sides with silicone implants. Subdermal scar tissue developed and fasciae constricted considerably. This caused a sensation of pressure and tightness in that region, along with shoulder and neck pain, as well as a restricted range of motion. After treatment with 6D Tape, the tissue is softer and more flexible.
Technology makes 6D Tape an unbeatable therapeutic aid
The latest technology and innovations were used to develop 6D Tape, and it has been thoroughly tested before release for sale. 6D Tape is a class 1 medical device, registered according to the European Union’s Medical Devices Regulation (MDR 2017/745/EU).